First of all, best wishes for the new year. Hopefully everyone has been able to enjoy the nice days with family and friends. I have been a bit less active on the blog for a while but want to post some articles again this year about new features related to O365, Azure, Windows365 and Azure Virtual Desktop. Let’s start with this one.
Have you ever gotten an authentication request from your work account when you’re not working? This was the question that a client asked me a while ago. This can be annoying and worrying, especially if you care about your work data security. In this blog post, I’ll share with you how I solved this problem for this client and for myself. I’ll show you how to use a feature called report suspicious activity in Entra, a tool that helps you manage your authentication requests. This feature can help you avoid unwanted requests and report any suspicious activity on your account. Want to know how? Read on.
If you’re like me, you probably didn’t even know this feature existed until recently. But it turns out that it’s a very useful and powerful tool to protect your account from fraud and hacking attempts. I’ll show you how to enable and use report suspicious activity, a feature that lets you report any unknown and suspicious MFA prompts that you receive on your phone or Microsoft Authenticator app. These alerts are integrated with Identity Protection for more comprehensive coverage and capability.
This feature can help you prevent unauthorized access to your account and data, as well as alert the administrators of any potential security breaches. Users who report an MFA prompt as suspicious are set to High User Risk, which means that administrators can use risk-based policies to limit their access or require them to reset their password. This can also help you identify and disable any impacted users who might have fallen victim to phishing or malware attacks.
How to enable Report Suspicious Activity
To enable report suspicious activity from the Authentication methods Settings, you need to follow these simple steps:
- Sign in to the Microsoft Entra admin center as at least an Authentication Policy Administrator.
- Browse to Protection > Authentication Methods > Settings
- Set Report suspicious activity to Enabled.
- The feature remains disabled if you choose Microsoft managed.
- Select All users or a specific group
- Select a Reporting code, in this case 0
- Click Save.
Note: If you have both Report suspicious activity and Fraud Alert enabled, and you set a custom code for voice reporting, the Report suspicious activity code will override the Fraud Alert code.

What happens now ?
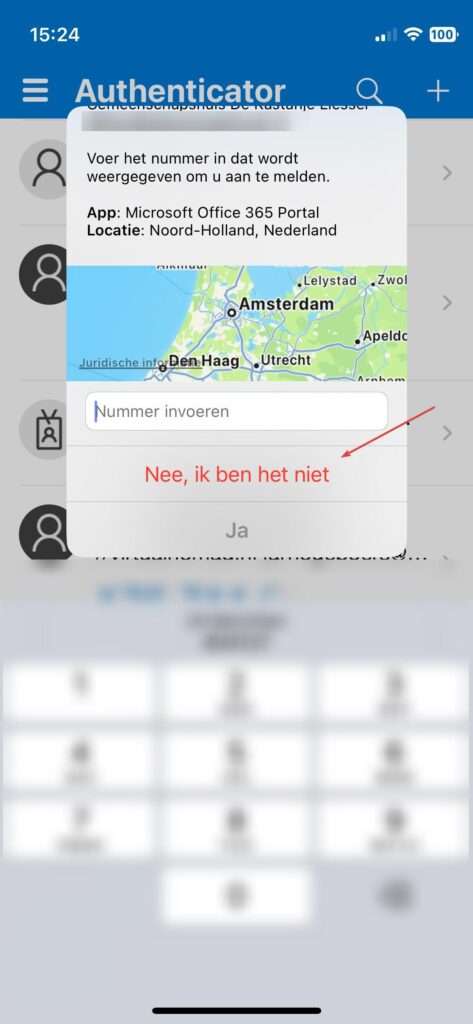
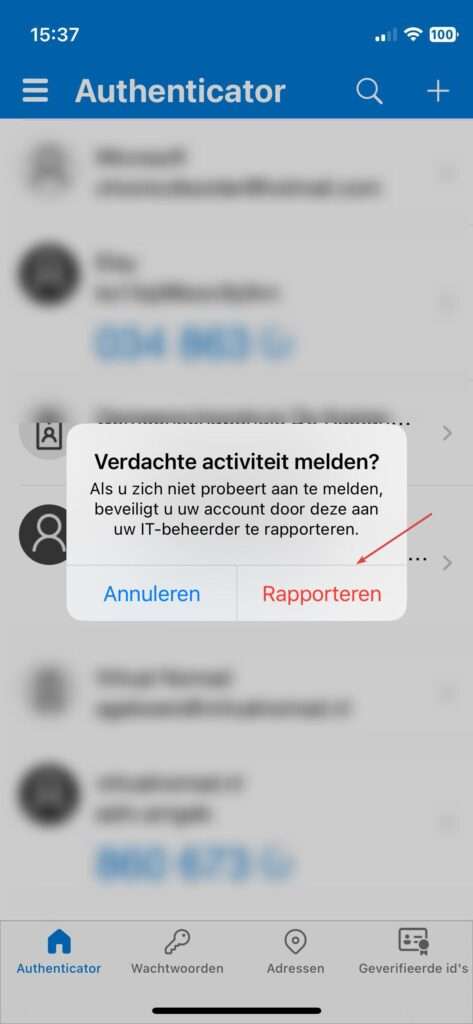
You can see how this feature works in the Microsoft Authenticator app below. It’s very easy and convenient to use. You just need to tap “Nee, ik ben het niet (No, it’s not me) and then “Rapporteren (Report this)” and confirm your action.


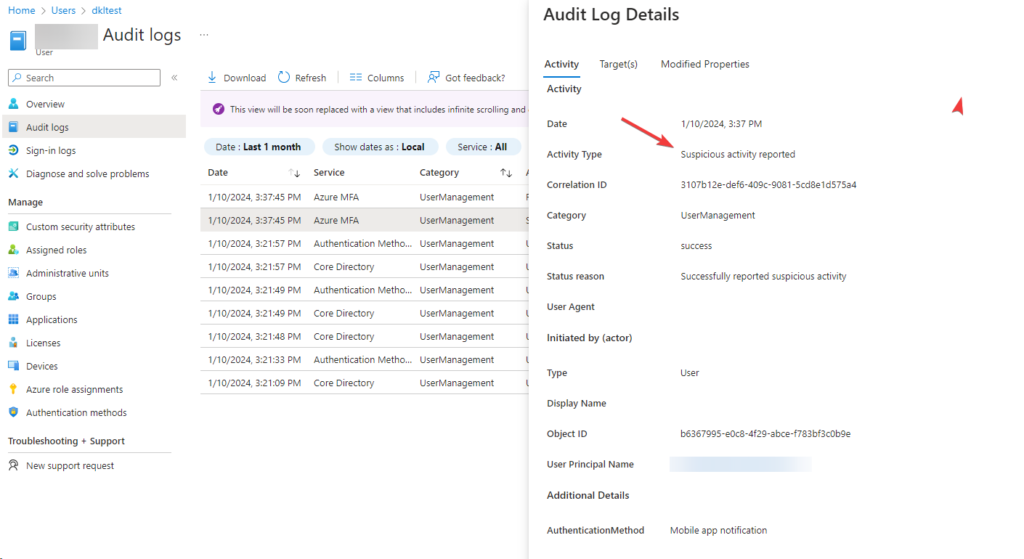
The audit logs of your account will also record that you reported suspicious activity.

You can use Report suspicious activity and Fraud Alert at the same time. While you test Report suspicious activity with a specific group, you can keep Fraud Alert for your whole tenant.
If you turn on both Fraud Alert with Automatic Blocking and Report suspicious activity, the user will be blocked and marked as high-risk and subject to any other policies you have. To let these users sign in with MFA, you need to unblock them and fix their risk.
Okey ? Now we know ?
But that’s not all. This feature also integrates with Conditional Access, which allows you to force a password reset for users with high user risks. This way, you can prevent any unauthorized access to your account and data. For some users, you can also choose to block them completely. And if you want to alert the helpdesk or CISO about the suspicious activity, you can also send them an email with the details. Let’s see how that works.
Conditional Acces
It’s good to know that you need to have a Microsoft Entra ID P2 license to configure these settings.
- Sign in to the Microsoft Entra admin center as a Conditional Access Administrator or higher.
- Browse to Protection > Conditional Access.
- Select Create new policy.
- Give your policy a name that follows your organization’s naming conventions.
- Under Assignments, select Users and groups.
- Under Include, select All users.
- Under Exclude, select Users and groups and choose your organization’s emergency access or break-glass accounts.
- Under Target resources > Cloud apps > Include, select All cloud apps.
- Under Conditions > User risk, set Configure to Yes.
- Under Configure user risk levels needed for policy to be enforced, select High.
- Select Done.
- Under Access controls > Grant, select Grant access, Require multifactor authentication, and Require password change.
- Select Select.
- Under Session, select Sign-in frequency.
- Ensure Every time is selected.
- Select Select.
- Confirm your settings, and set Enable policy to Report-only.
- Select Create to create and enable your policy.
- After administrators confirm the settings using report-only mode, they can move the Enable policy toggle from Report-only to On.
After that a user is required to change his password and self-remediate the risk.
Notification
To configure suspicious activity notifications:
- Go to Protection > Multifactor authentication > Notifications.
- Enter the email address to which you want to send the notification.
- To remove an existing email address, select … next to the email address, and then select Delete.
- Select Save.

Although this option has been available for some time, it’s not widely known. It’s easy to set up, and since users can reset their own passwords, there’s no need for support intervention. This is an effective way to prevent unwanted authentication requests while you’re enjoying a refreshing cocktail on the beach. So, why not give it a try today and see how it can benefit your organization?
See the following link from Microsoft for more information.

