
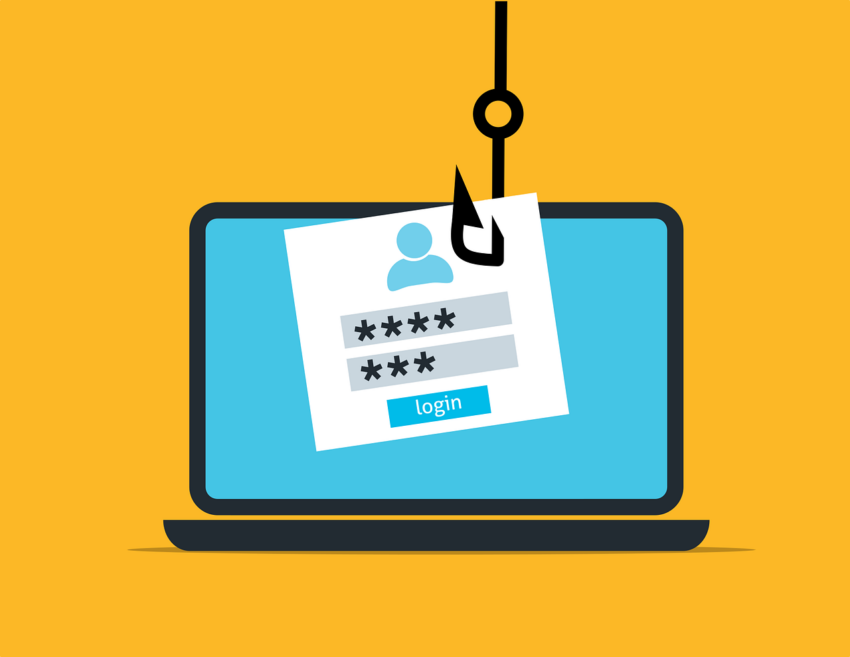
In today’s digital age, phishing emails remain a persistent threat to organizations worldwide. Users often find themselves grappling with questions on how to handle these malicious emails. They may wonder who they should forward the phishing mail to or how to prevent such threats in the future. In this blog post, we’ll explore a simple yet effective solution to address these concerns and improve your organization’s cybersecurity posture.
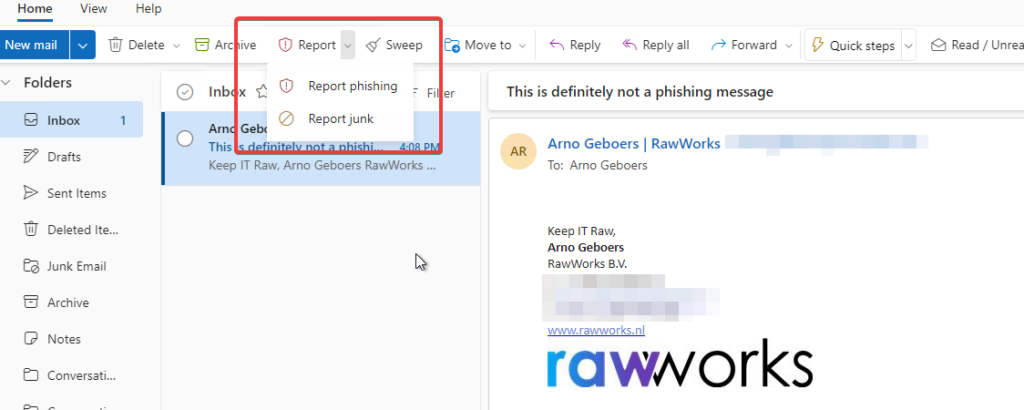
In the Office 365 toolbox, there’s a handy tool that makes reporting suspicious emails a breeze for everyone involved. This essential add-in, once activated within your Office 365 setup, introduces the ‘Report Message’ button. This button not only simplifies the reporting process but also unlocks the power of Microsoft’s security teams and systems.
By flagging emails for examination using this button, you’re aiding in the swift development of threat signatures that fortify email security, protecting users from similar threats in the future.
Here’s a quick guide on how to enable it:
- Access the Microsoft 365 Admin Center:Start by logging in to the Microsoft 365 admin center at https://admin.microsoft.com.
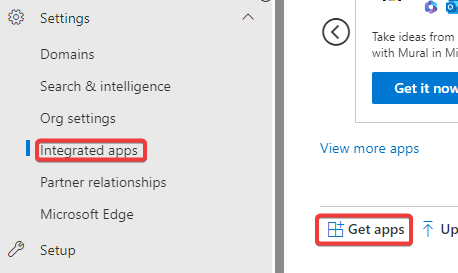
- Navigate to Integrated Apps:On the left navigation pane, click “Show All,” then expand the “Settings” section, and select “Integrated Apps.”
- Browse Available Apps:Once you’re in the Integrated Apps settings, click on “Get Apps.”
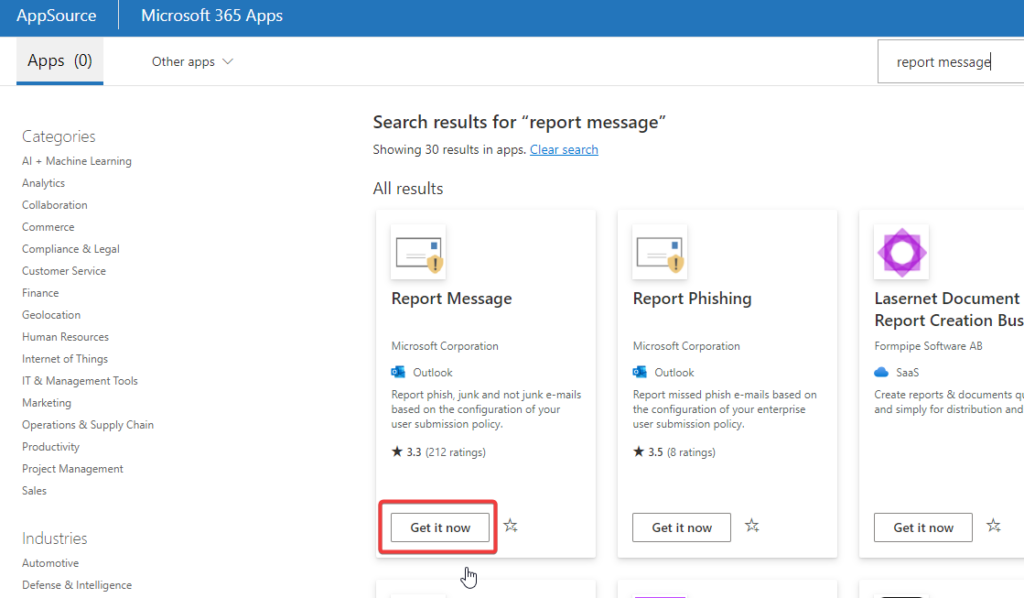
- Search for the Add-In:In the top-right corner of the page, you’ll find a search box. Type in “Report Message” or “Report Phishing,” and hit “Search.”
- Select the Right App:From the search results, find the app published by Microsoft Corporation and click “Get it now” and again Get it now.
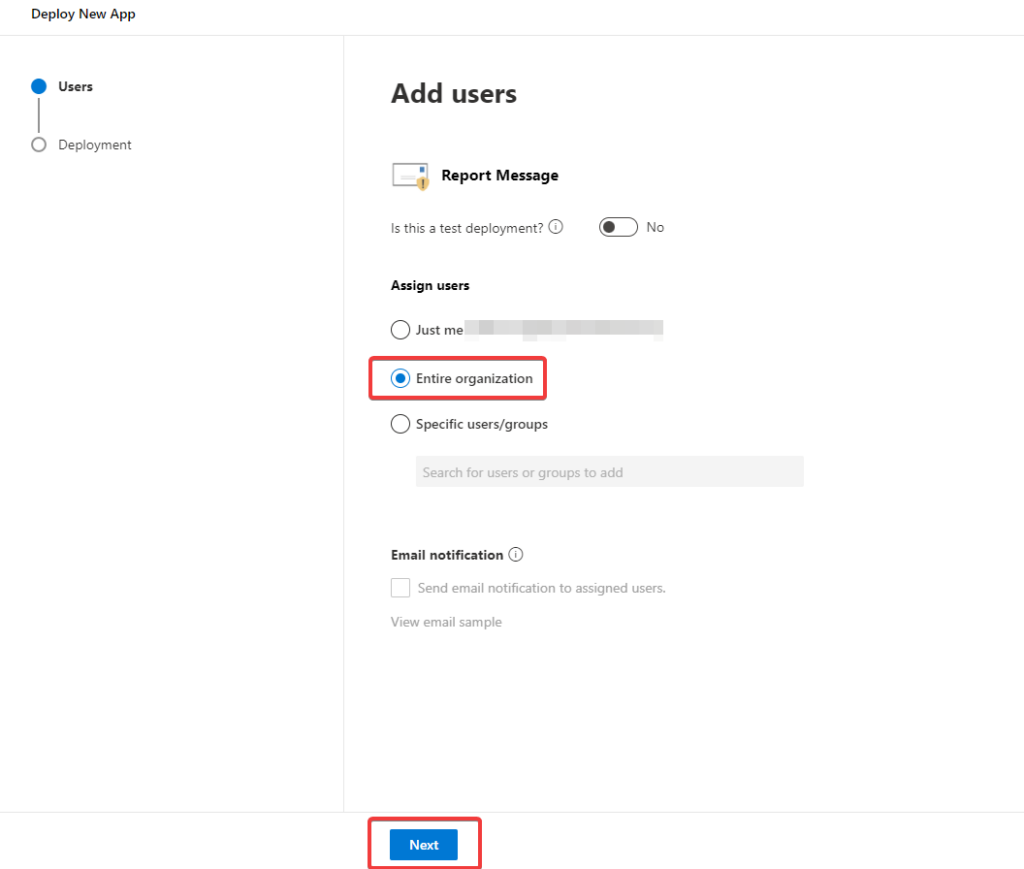
- Choose Your Deployment Target:A flyout menu will appear. Here, you can decide who you want to deploy the add-in to. If you’re testing it, you might want to select a specific group. Otherwise, you can configure it for the entire organization. Once you’ve made your choice, click “Next.”
- Review Permissions and Capabilities:Take a moment to review the permissions, information, and capabilities of the add-in. When you’re ready, click “Next.”

- Complete Deployment:Finally, click “Finish deployment.” Please note that it may take some time (typically 12-24 hours) for the add-in to automatically appear in Outlook clients.
So, there you have it—your organization’s key to a safer digital world, a happier helpdesk, and a more relaxed Information Security Advisor (who might just have time for a coffee break now). With the Report Message Add-In and Microsoft Defender for Office 365 by your side, phishing emails don’t stand a chance. 🚫🎣💥