External email warnings are essential for alerting users about potential malicious links or phishing emails sent by external senders. These warnings play a significant role in protecting against spam and phishing threats. Admins have traditionally used a transport rule to add an [External] tag in the subject line. However, this approach has a few limitations:
- The tag consumes valuable space in the subject line, making it difficult to preview the subject.
- The transport rule might not account for the end user’s language, resulting in localization issues.
- Multiple external tags can accumulate if external users continue replying to a thread.
- To address these limitations, Microsoft introduced native external sender callouts in Outlook.
Native External Sender Identification – External Tag:
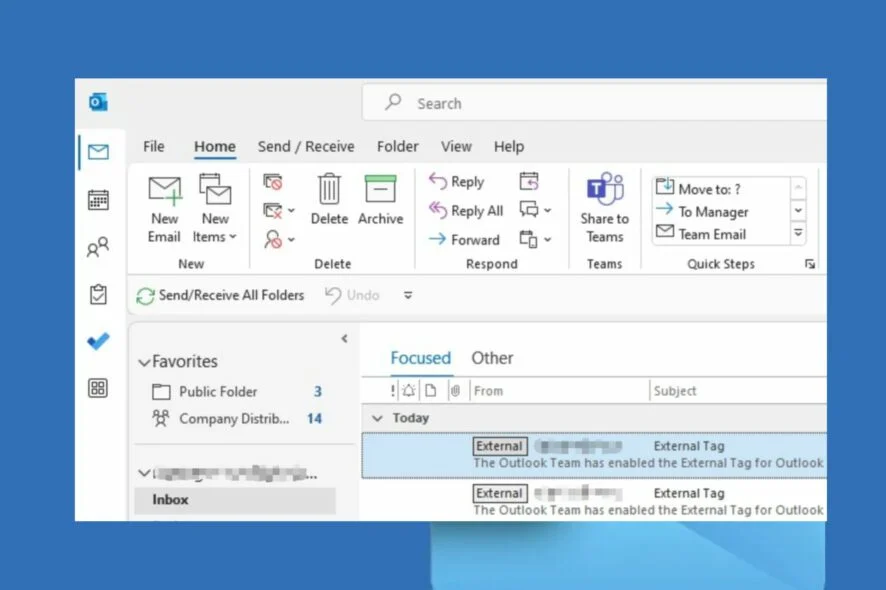
Microsoft developed a new ‘External’ tag to offer a more user-friendly way of identifying external emails. The External tag appears on emails from external senders, making it easier for users to view and verify the actual sender’s email address.
Once you enable external tagging, external email alerts will look similar to the accompanying screenshot:

Unleashing the Power of External Tagging in Exchange Online
By default, external tagging is taking a nap. You can wake it up and enable it through Exchange Online PowerShell.
Heads up: If you’re using the transport rule to stamp an [External] tag in the subject line, give it a break before enabling native external tagging. Otherwise, your emails might end up wearing ‘External’ badges like mismatched earrings.
To enable the external tag, follow these simple steps:
Step 1: Connect to Exchange Online PowerShell to access the external tagging cmdlets
Step 2: Run the Set-ExternalInOutlook cmdlet like a maestro to turn on external tagging:
Set-ExternalInOutlook –Enabled $true
To sneak a peek at your external tagging settings, use the Get-ExternalInOutlook cmdlet.
Get-ExternalInOutlook | Format-TableOnce you enable this nifty feature, incoming external emails will sport an ‘External’ tag. Don’t worry, it won’t mess with your existing emails.
Excluding Specific Email Addresses or Domains from External Tagging
Sometimes, you might want to give certain external senders or domains a “VIP pass” and spare them the ‘External’ tag treatment. That’s when the ‘AllowList’ parameter comes in handy.
Method 1: For replacing the guest list and inviting multiple entries,
Set-ExternalInOutlook –AllowList "test.user@asampledomain.com","virtualnomad.nl" With the above cmdlet, test.user@asampledomain.com and the virtualnomad.nl domain get to skip the ‘External’ tag velvet rope.
Keep in mind, the guest list is capped at 30 entries, and the total size of all entries shouldn’t exceed one kilobyte (pack light!).
Method 2: To add fresh faces without disturbing the existing partygoers,
Set-ExternalInOutlook –AllowList @{Add="contosokaniewelweer.com","john@bonjovi.us"}This command rolls out the no-tag carpet for contosokaniewelweer.com and john@bonjovi.us, in addition to the previously exempted domains.
Should you decide to revoke a domain or external user’s VIP status from the AllowList, simply use the cmdlet below:
Set-ExternalInOutlook –AllowList @{Remove="contosokaniewelweer.com","john@bonjovi.us"}Exchange Online External Tag Playing Hide and Seek?
Here’s What to Do: If you’ve enabled external tagging but can’t spot the tag on external emails, you might be experiencing one of the following scenarios:
- Patience is a virtue: External tagging is an org-wide setting, so it takes some time for Exchange Online to apply the changes. Microsoft mentions it can take 24-48 hours, so give it a little while for the external tags to appear on emails from external senders in supported Outlook versions.
- Compatibility check: External email tagging is supported in these Outlook versions:
- Outlook on the web
- Outlook mobile (iOS & Android) – version 4.2111.0 and higher
- Outlook for Mac – version 16.47 and higher
- Outlook for Windows – available from May 2021
- Are you part of the cool kids club? External tagging is a shiny new feature, so ensure your account is enabled for targeted release in the Microsoft 365 admin center. Users on targeted release get a sneak peek at new updates before the general population.
Deciding Between Transport Rule and Native External Tag
Native external tagging has a more limited range of customization options compared to the transport rule since it’s a global setting. If your organization requires more fine-tuned control over external tagging, you might want to opt for the transport rule.
Consider these scenarios:
- If your organization is a consultancy, you probably receive a lot of emails from external users. In this case, it’s crucial to exclude external tags for customer-facing mailboxes (e.g., support or sales) to prevent all incoming messages from being tagged as External.
- Suppose you want different sender-based warnings – one for popular domains like Gmail, Outlook, and Yahoo, and another for other business emails.
- If you’re aiming to personalize the appearance and content of the external warning message, the native cmdlet might not be your best bet.
In these situations, configuring an external email warning through a transport rule would be the way to go.
The End!
The native external tagging cmdlet has been a highly anticipated feature, and it undeniably enhances email security. As an admin, do you prefer sticking with the transport rule or making the leap to the native PowerShell cmdlet? Feel free to share your thoughts and experiences in the comment section below.

