Welcome back to Part 2 of our comprehensive Windows 365 deployment guide! If you’ve been following along, you’re well on your way to becoming a Windows 365 pro. In this part, we’ll delve into some more advanced topics to help you further refine your Cloud PC experience:
- Establish an Azure Network Connection (optional)
- Create a Custom Image (optional)
So, buckle up and grab your favorite tech-savvy beverage, as we embark on the next phase of our Windows 365 adventure together!
Establish an Azure Network Connection
An Azure network connection may be necessary if you require a direct connection to your backend infrastructure without needing a VPN solution. For this, a vNet must already be configured in Azure. However, if this isn’t a requirement, you can use the Microsoft-hosted network instead.
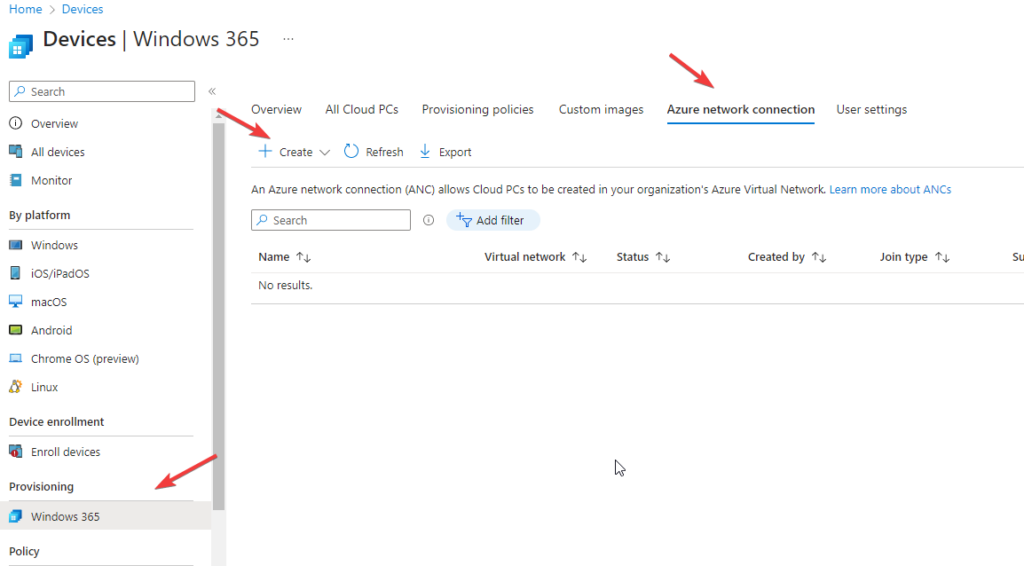
To establish an Azure network connection, open the Azure network connection tab, click + Add, and select one of the following options:
Azure AD Join: Choose this if Azure AD Join alone is sufficient.
Hybrid Azure AD Join: Select this if a (local) AD domain join is also necessary. Note that additional Intune and Azure AD Connect configurations are required for Hybrid Azure AD Join.
In this example, we’ll opt for Azure AD Join only.
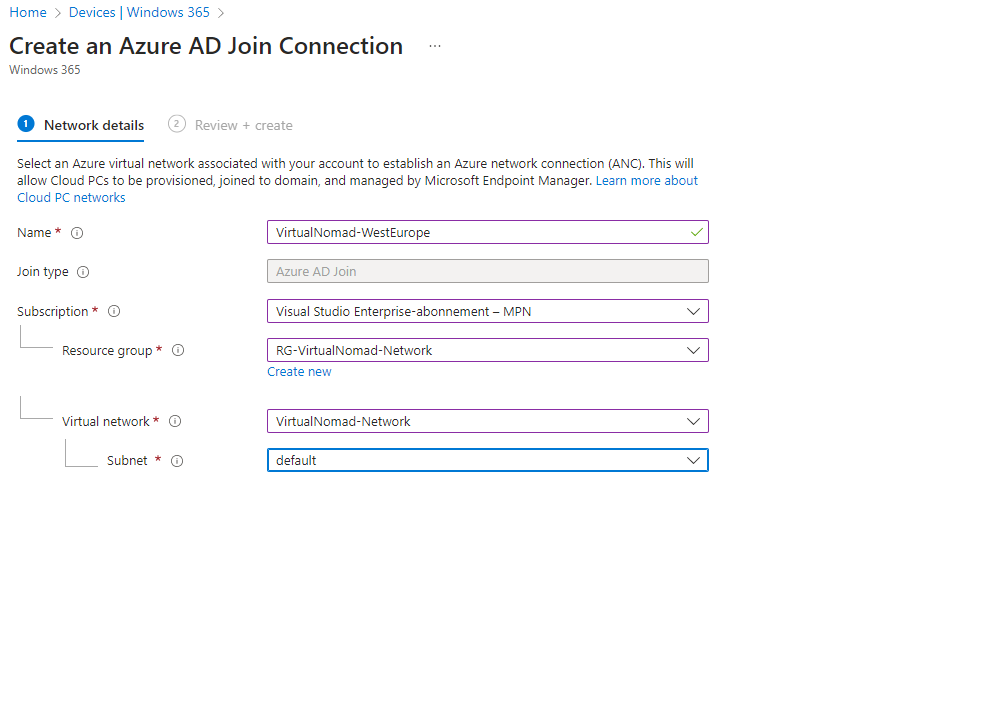
Assign a name to the Azure Network connection. Then, select your subscription, resource group, and virtual network, including the subnet.
Click Next, followed by Review + create.
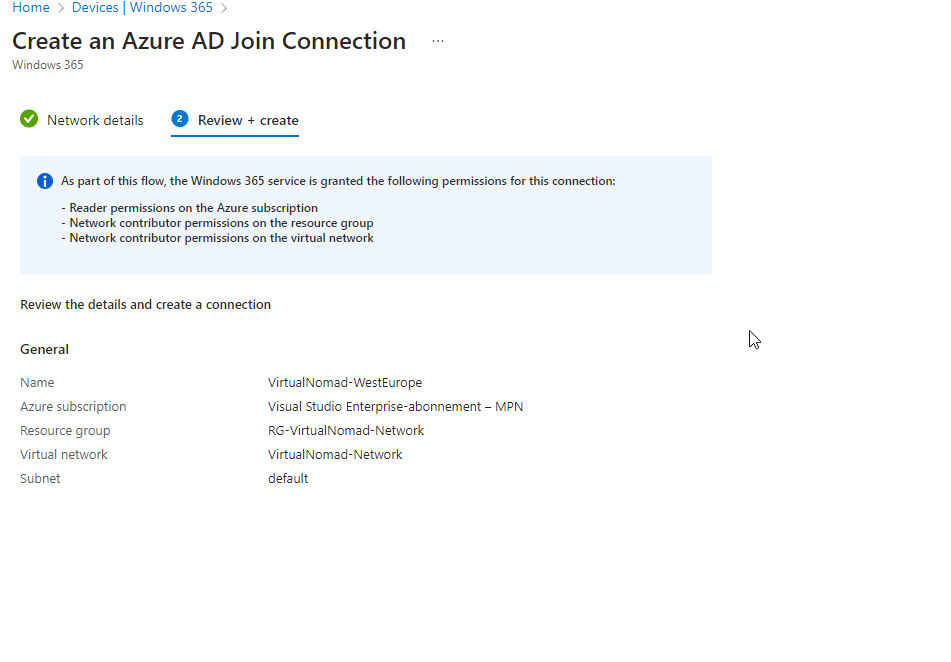
This initiates the Azure network connection creation within the Microsoft Intune admin center.
After a few minutes, if everything is configured correctly, a “checks successful” status will appear. You can click on the status for more information.
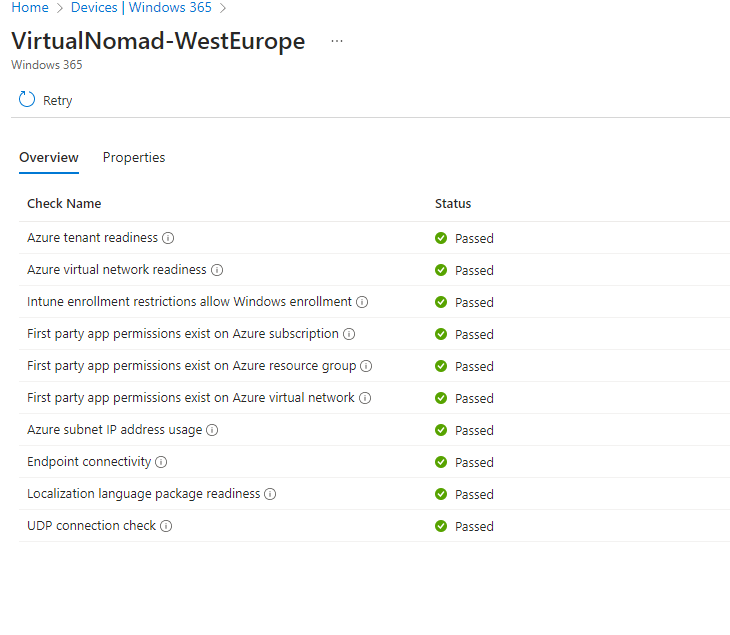
If a warning or error is displayed, you can find further details by checking the provided information.
Create a Custom Image
Creating custom images for deploying Cloud PCs is an option, though not required. Frankly, I’d try to sidestep it, as image management demands considerable time and effort. With modern management, it’s best to start with a “squeaky clean” Windows 11 installation, where all policies are applied and apps are installed from Microsoft Intune. This approach offers maximum flexibility, much like Windows Autopilot.
Nonetheless, if you have a use case where custom images are helpful, the option is there. To create one, you’ll first need to generate a new Virtual Machine in Azure. Head over to the Microsoft Azure Portal for the next steps.
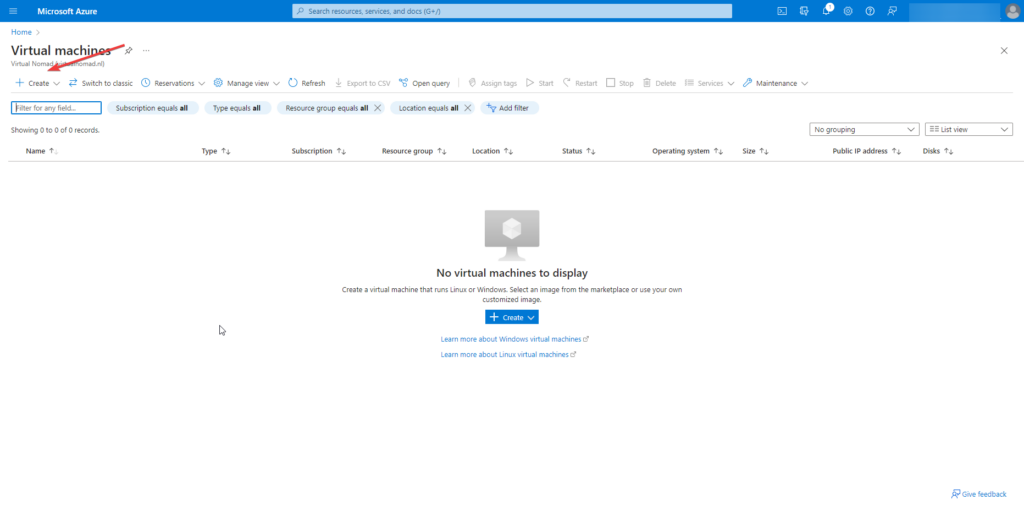
Open the Virtual Machines blade and click + Create.
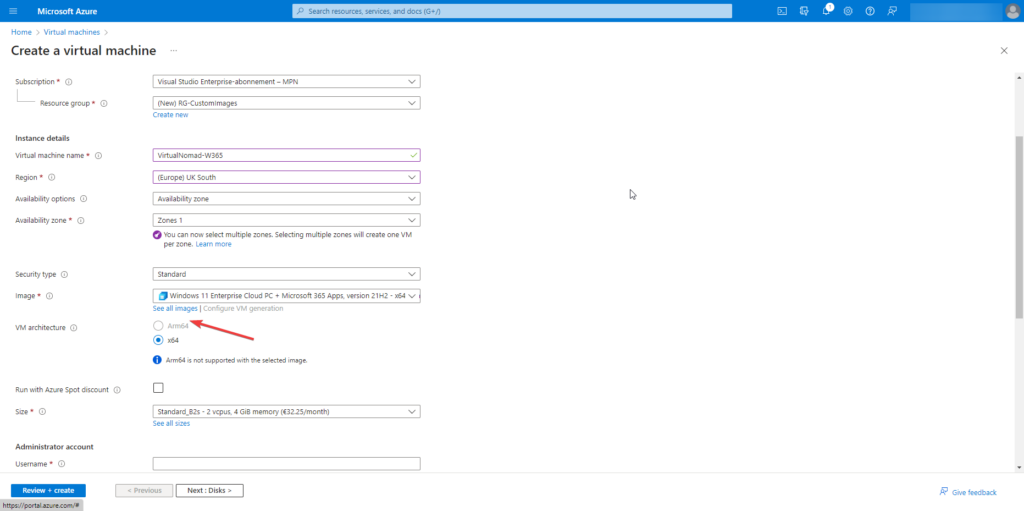
Name your virtual machine and fill in the required fields, such as subscription and resource group. Click See all images.
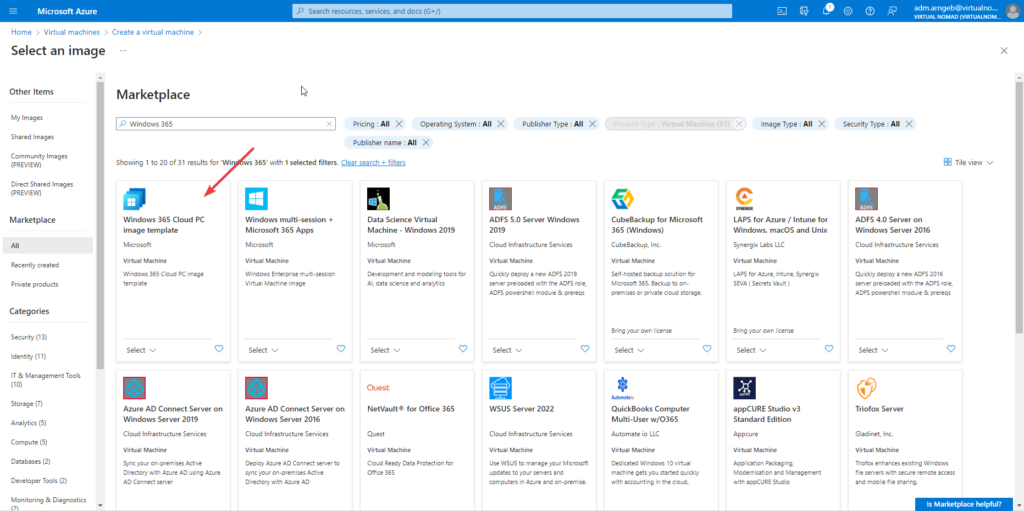
Search for Windows 365 and select the Windows 365 Cloud PC image template. Pick the image that suits you best: Windows 10 or 11, with or without Microsoft 365 Apps, and the build number.
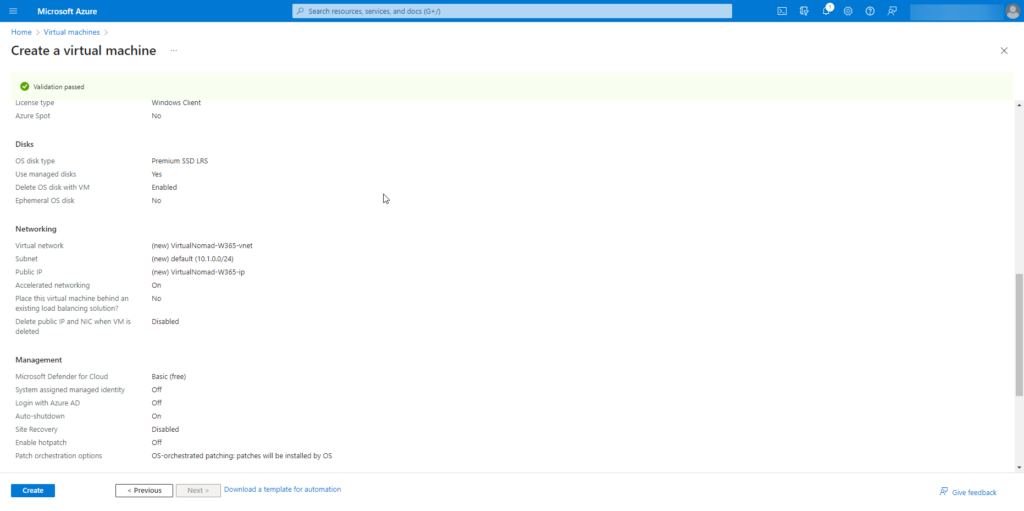
Configure the remaining virtual machine settings. I’ll skip these for now and stick with the defaults. Click Review + create, followed by Create.
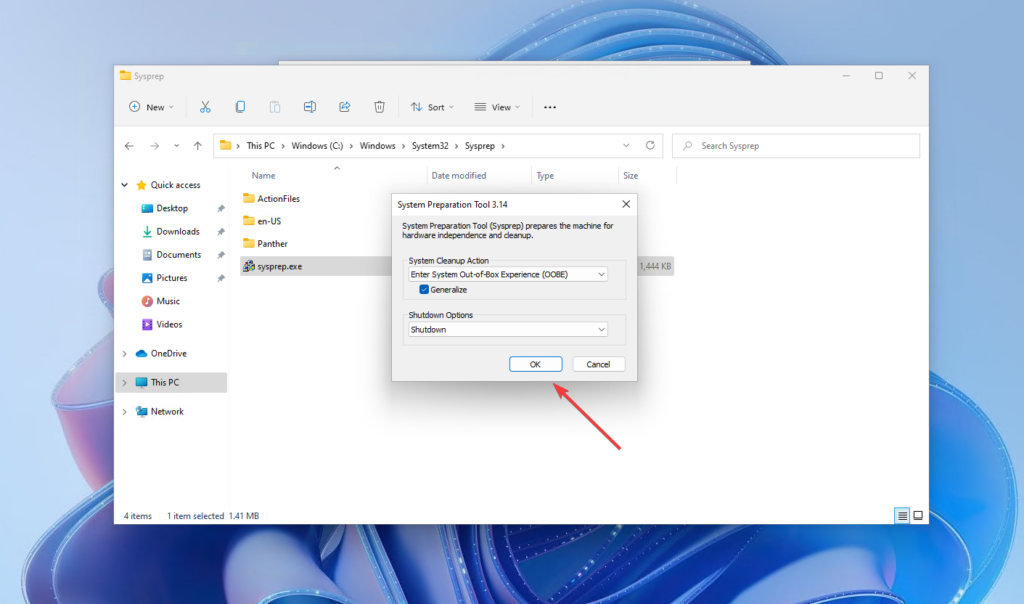
Once the virtual machine is deployed, connect to it and adjust settings or install necessary applications. When ready, run c:\Windows\System32\Sysprep\sysprep.exe. Choose Enter System Out-of-Box-Experience (OOBE) as System Cleanup Action, ensure Generalize is selected, and pick Shutdown as the Shutdown Options. Click OK.
After the virtual machine’s status in Azure changes to Stopped, deallocate it.
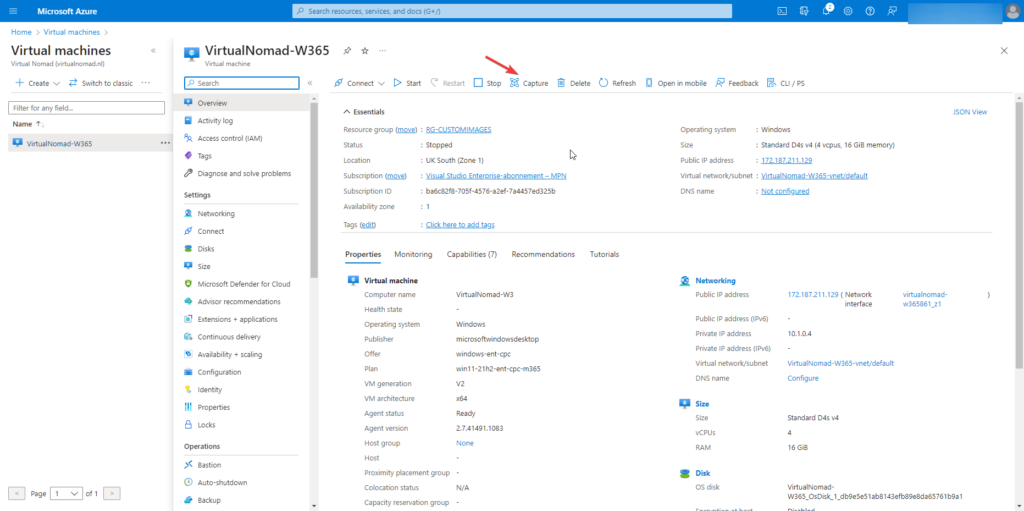
In the Microsoft Azure portal, open the Overview page of the Virtual Machine and click Capture.
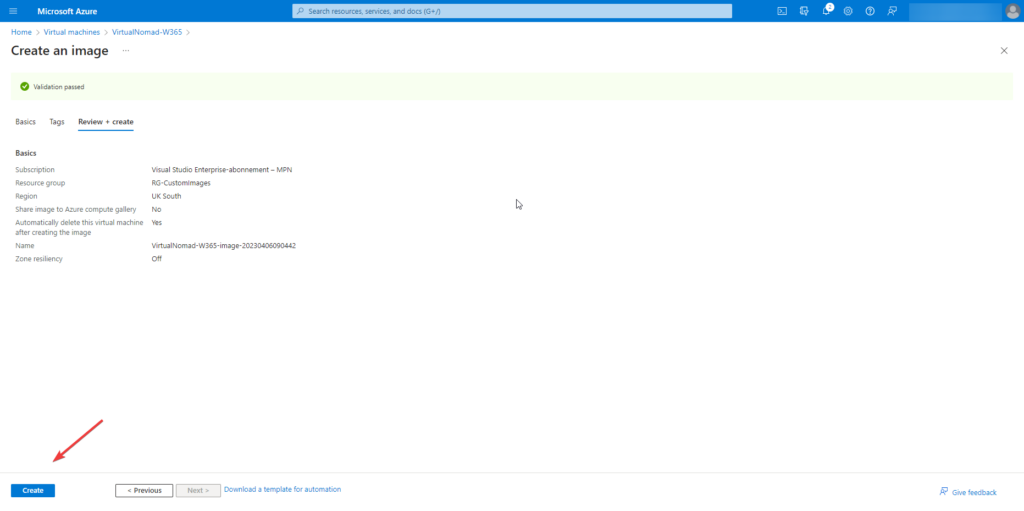
Choose the Resource group for the VM capture. Sharing the image to a gallery is optional for Windows 365 Enterprise Cloud PC. For now, I’ll skip the gallery steps and save the image in the Azure Resource Group. Opt to Automatically delete this virtual machine after creating the image (since you can’t use the VM after running Sysprep anyway). Name the image and click Review + Create and hit Create.
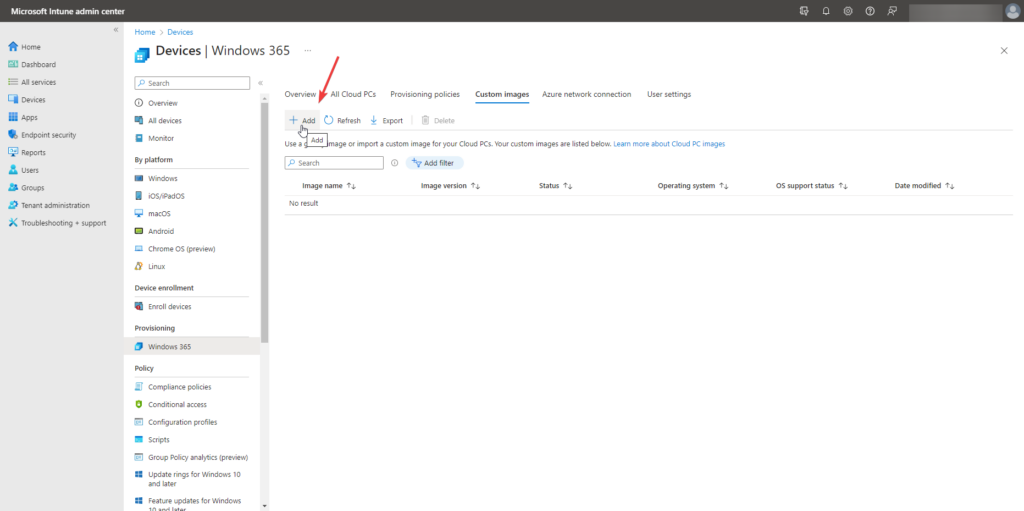
Head back to the Microsoft Intune admin center, select Custom images, and click + Add.
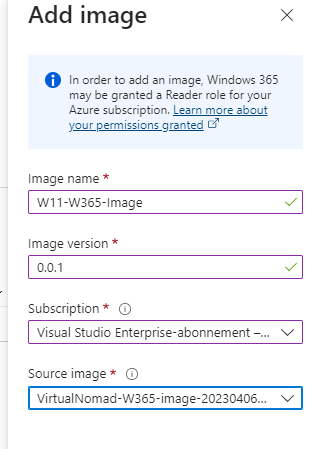
Name the image and assign an Image version (in the “x.x.x” format, like 0.0.1). Choose the subscription. The newly-created image should be available in the drop-down menu. Click Add.

The upload will commence, which may take a little time.

Once the upload is complete, the status will change to “Upload successful.”

