Windows 365 is a cloud-based service that bestows Cloud PCs upon end users. It’s not merely a virtual machine sprinting around in Azure. In addition to a personalized desktop in the cloud, accessible from any location on any device and optimized for Microsoft 365 (including Microsoft Teams AV redirection), it sports a few nifty and unique features for end users – like the ability to restore the Cloud PC from a snapshot sans IT administrator intervention.
For the IT administrator, Windows 365 is the epitome of simplicity. It can be deployed with a few clicks (demonstrated step-by-step in this post) and is fully integrated into the Microsoft Intune admin center. Here, you can apply the same policies and publish the same applications as on your current Intune managed devices. No need for extra VDI know-how, creating an entirely new policy set, or managing separate IT environments. Plus, it comes with a fixed price per-user per-month, regardless of how many hours you spend on the Cloud PC each month.
In this post, we’ll explore the following steps:
- Windows 365 Enterprise requirements
- Allocating Windows 365 licenses to users
- Fine-tuning user settings
Windows 365 Enterprise Requirements
Before embarking on the Windows 365 Enterprise Cloud PC deployment, ensure the following prerequisites are in place:
– An Azure subscription (if opting for your own hosted vNet)
– Windows 365 Enterprise license
– Microsoft Intune + Windows 10/11 Enterprise + Azure AD P1 (or Microsoft 365 F3/E3/E5/A3/A5 licenses, Microsoft 365 Business Premium, or Microsoft 365 Education Student Use Benefit subscriptions)
– An operational Azure AD environment
– A functioning Microsoft Intune environment
– Optional: An up-and-running Azure Network configuration (vNet) (including accurate DNS configuration)
– Optional: An “on-premises” Active Directory in working order
– Optional: Site-to-Site VPN / Express route for domain controller access within the Azure Network (alternatively, the domain controllers can operate in Azure itself)
– Optional: Azure AD Connect running smoothly with Hybrid Azure AD configuration (computer objects for Cloud PC need to sync to Azure)
Allocating Windows 365 licenses to users (Like a Tech Wizard)
There are multiple ways to grant licenses to users, such as through the Microsoft Entra portal, Azure AD portal, or the Microsoft 365 admin center. Since the Microsoft 365 admin center also offers a great free trial license option, we’ll cover that method.
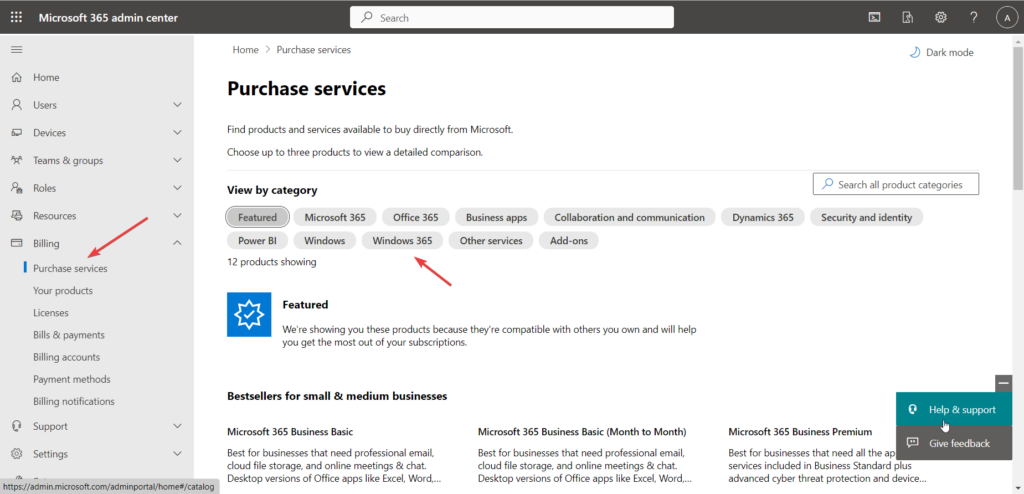
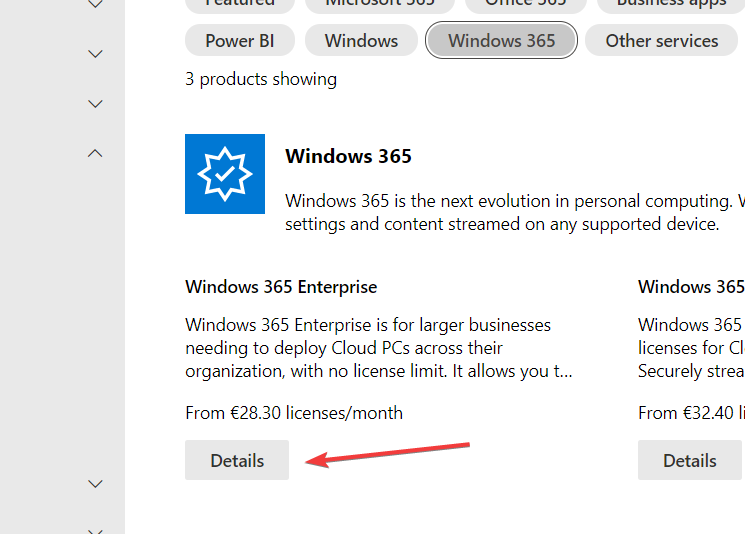
First, open the Microsoft 365 admin center and navigate to Billing > Purchase services. Click on Windows 365, and under Windows 365 Enterprise, click Details.
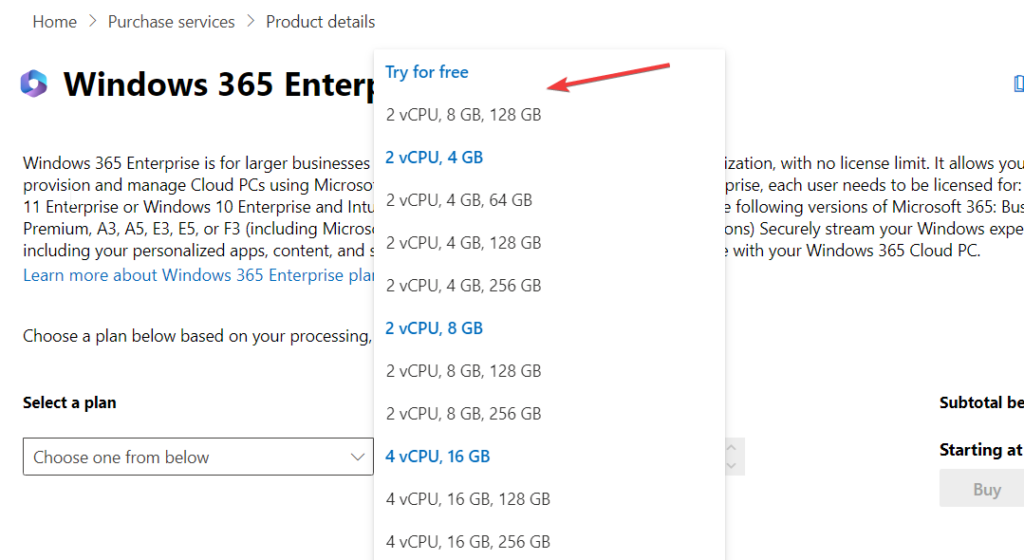
If you’re not yet a proud Windows 365 license owner and wish to test the waters, feel free to activate a free trial license. In the “Select a plan” drop-down menu, there’s an enticing “Try for free” option, allowing you to dive right into the world of Windows 365.
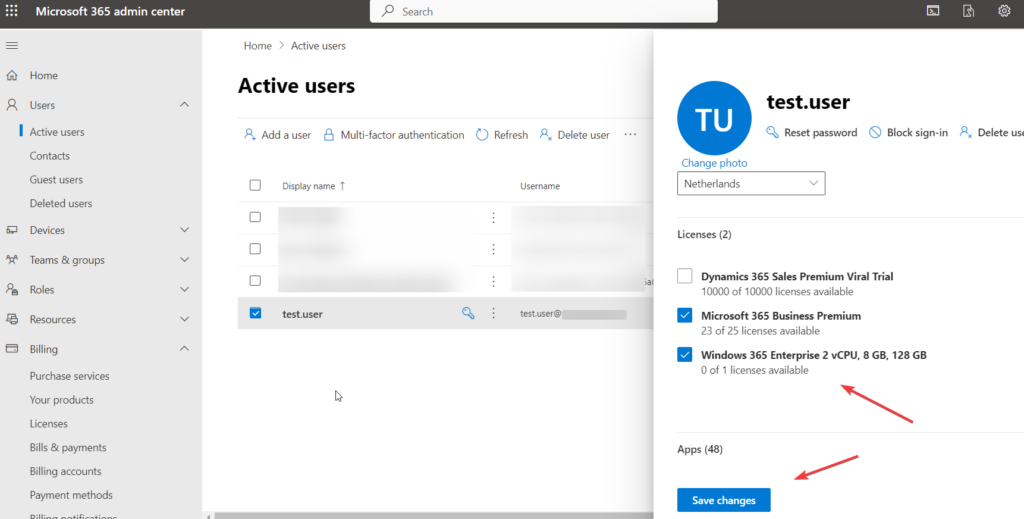
To gift a user a Windows 365 license, navigate to Users > Active users, and click on the lucky user. Head to the Licenses and apps page and bestow upon them the Windows 365 Enterprise license.
As an alternative, you can also distribute licenses based on group membership in Azure AD, like I mentioned in another blog. Neat, right?
Fine-tuning user settings
User settings enable you to decide whether users should have local admin rights or not. Additionally, you can set up a point-in-time restore service, creating snapshots of the Cloud PC based on the frequency you choose. User settings policies are assigned to Azure AD groups, allowing you to establish different policies for various user groups.
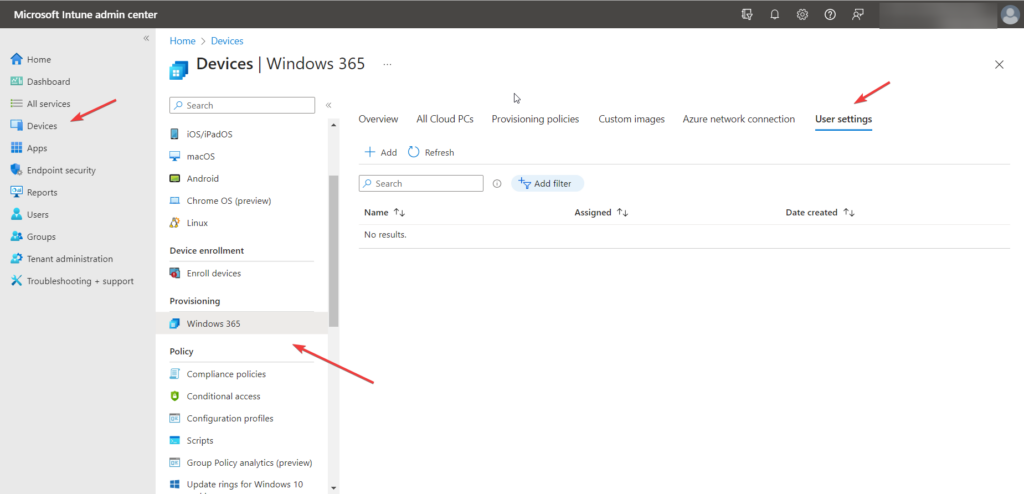
In the Microsoft Intune admin center, navigate to Devices > Windows 365, and click on User settings. Then, click + Add.
Give the policy a name and decide if users should have local admin rights. For the point-in-time restore service, you can create up to 10 snapshots, allowing users to restore their Cloud PC to earlier states.
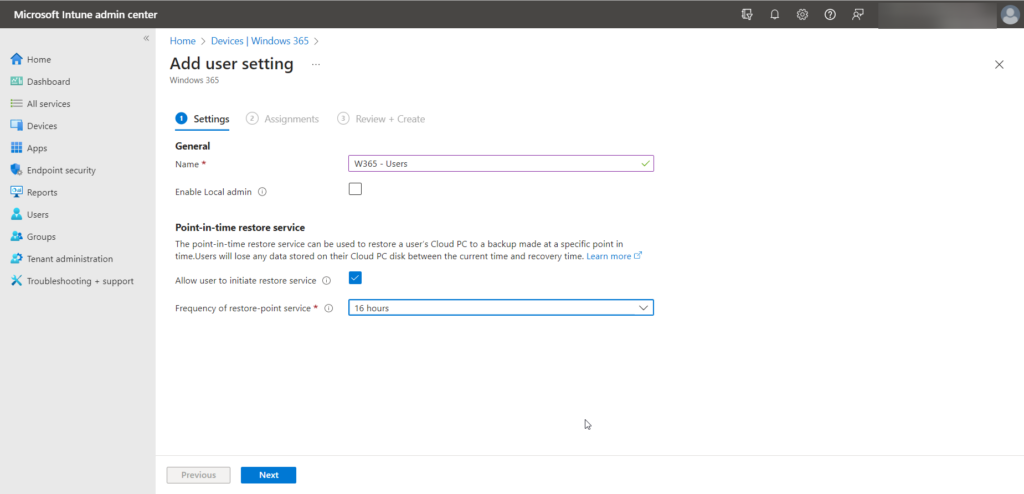
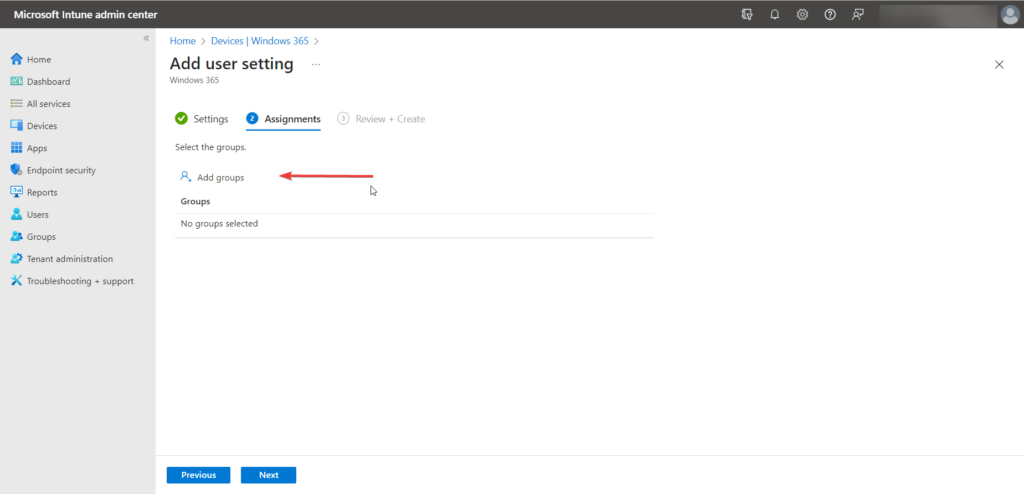
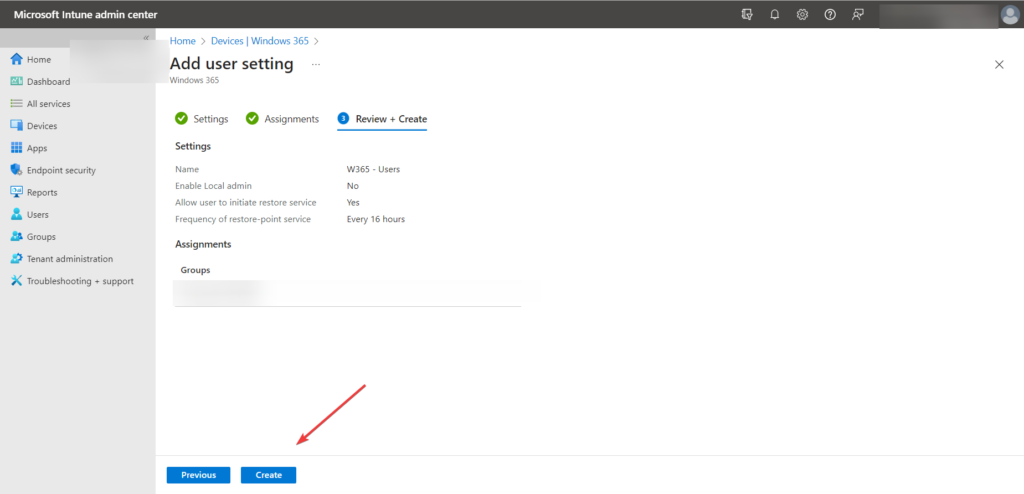
Click Next, select an Azure AD user group, and click Next again. Finally, click Create to apply your customized settings.
And there you have it, folks! We’ve reached the end of Part One of our Windows 365 configuration journey. We hope this guide has been informative and provided some valuable insights to help you get started. But don’t be afraid, our adventure is far from over. Stay tuned for Part Two, where we’ll dive deeper into the world of Windows 365 and explore even more tips, tricks, and best practices to make your Cloud PC experience truly exceptional.

